Shaping sourdough loaves is a crucial step in the bread-making process. It contributes not only to the aesthetic appeal of your bread but also to its structure and oven spring. This guide provides a detailed, step-by-step approach to shaping sourdough loaves,
Let the dough rest on the table for 30-40 minutes so that the gluten in the bread dough can be allowed to relax before it is to be shaped into the final bread.
Why Shaping Matters
Proper shaping creates tension on the surface of the dough, which helps the loaf hold its form and rise upwards during baking rather than spreading outwards. It also helps to organize the gluten structure, contributing to a more even crumb.
Tools You'll Need
- Dough scraper
- Flour
- Work surface
- Banneton or proofing basket (optional)
- Rice flour (for dusting the banneton)
- Plastic bag or cloth
Step-by-Step Shaping Guide
1. Preshaping:
- Lightly flour your work surface.
- Gently scrape the dough out of its bulk fermentation container using a dough scraper. Alternatively, you can use wet hands to gently lift the dough.
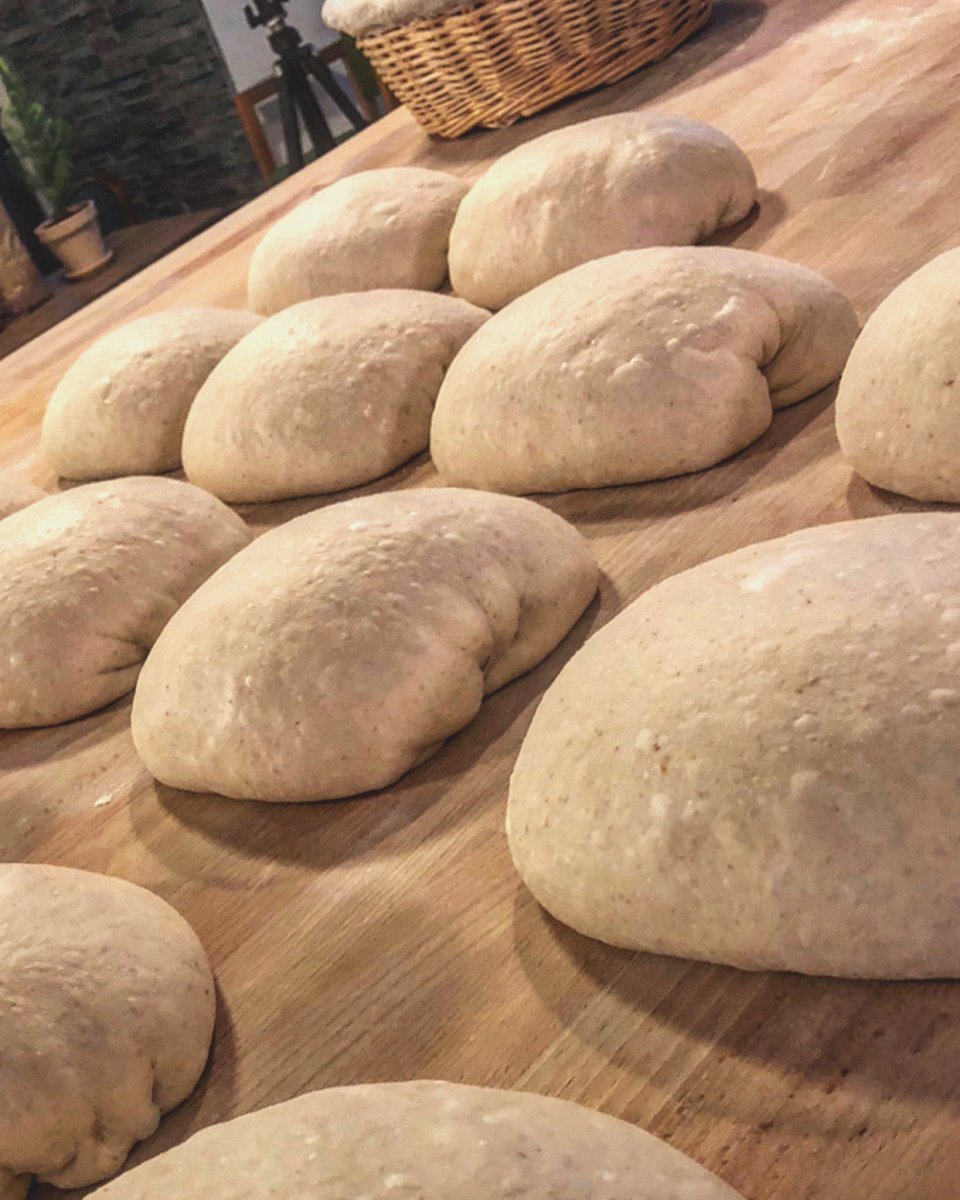
- Use a dough scraper to loosen the dough from the work surface and gently shape it into a round, taut ball. This is called preshaping.
2. Resting:
- Allow the preshaped dough to rest on the work surface for 30-40 minutes, uncovered. This allows the gluten to relax, making it easier to shape the dough further.
3. Final Shaping:
- Lightly sprinkle flour on top of the dough ball.
- Using the dough scraper, carefully flip the dough over so the floured side is facing down.
- Grasp the side of the dough closest to you and lift the outer third upwards, folding it over the center of the dough. Gently press the flap to seal it in place.
- Grasp the sides of the dough where you folded the flap, stretch them outwards gently, and fold them inwards over the center, creating an envelope shape.
- Grasp the top of the dough, stretch it slightly upwards, and fold it down over the rest of the dough.
- Grasp the dough in two or three places lengthwise, pull it gently outwards, and fold it over itself like a braid.
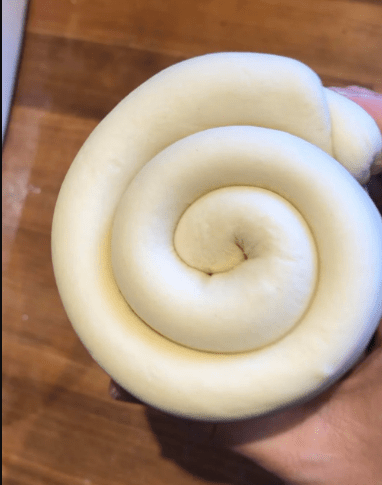
- Grasp one end of the dough and roll it tightly towards the center, creating a smooth surface with the folds facing down.
- Let the shaped loaf rest on the table for 4 minutes.
4. Proofing:
- If using a banneton, dust it with rice flour. Gently place the shaped loaf seam-side up in the banneton.
- Cover the banneton with a plastic bag or cloth and let it rest at room temperature for 30 minutes.
- Transfer the banneton to the refrigerator to proof overnight.
Tips for Success
- Flour: Use just enough flour to prevent sticking, but avoid using too much, as it can dry out the dough.
- Gentle Handling: Handle the dough gently to avoid degassing it.
- Practice: Shaping takes practice. Don't worry if your first few attempts aren't perfect.
Conclusion
Mastering the art of shaping sourdough loaves takes time and practice, but the results are well worth the effort. By following these steps and practicing your technique, you'll be well on your way to creating beautiful and well-structured sourdough bread.
Share on socials:
How to bake Sourdough Bread with Perfect Crust
How to Sourdough: Understanding the Basics
2 comments
Thanks, from Argentina. I like very much your bread🙌🏼
Hallo
Like to ask on the photo hefing basket is shown 2 for pris 109 DK
do I understand right??
Best regard’s
Gudrun